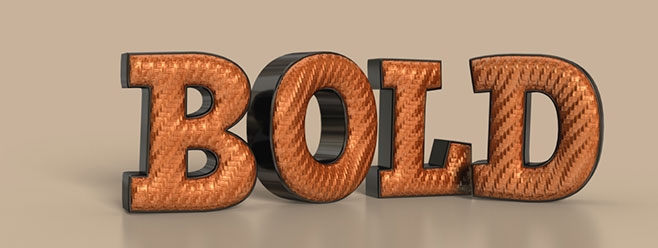
الشكل النهائى
خطوات عمل التصميم بالشرح انجليزى
Step 1
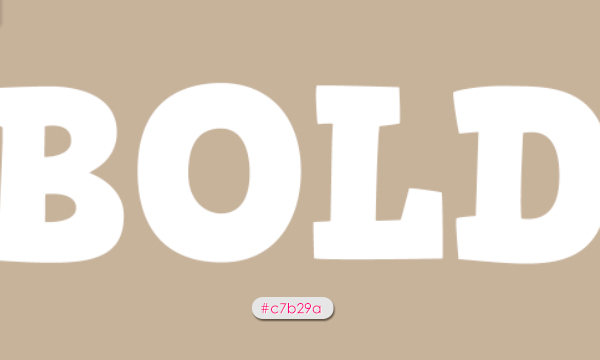
Create a new 1200 x 1000 px document, and fill the Background with the color #c7b29a. Then, create the text in All Caps using the font ” HVD Comic Serif Pro”, the color White, and the font Size 393 pt.
(Don’t pack the scene with way too many letters – Five letters or less give the best result.)
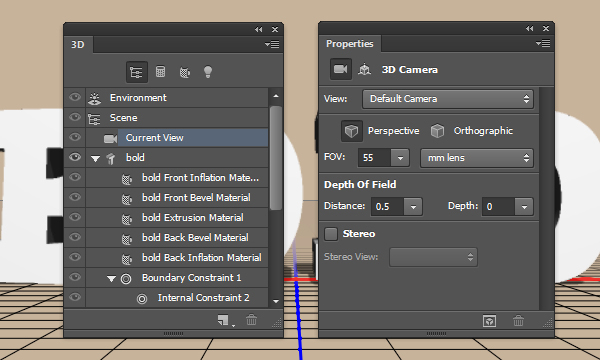
Go to 3D -> New 3D Extrusion from Selected Layer. This will convert the text into a 3D mesh.
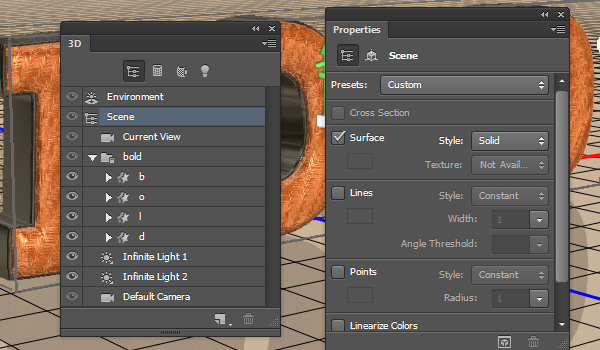
To access the 3D mesh settings and properties, you’ll need to open two panels: The 3D panel, and the Properties panel (both found under the Window menu).
The 3D panel has all the components of the 3D scene, and when you click the name of any of those, you’ll be able to access its settings in the Properties panel. So make sure to always select the name of the element you want to modify in the 3D panel before you change its settings in the Properties panel.
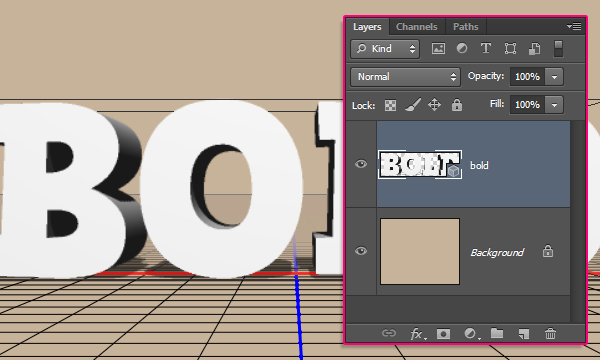
You can now see that the text layer is a 3D layer.
 Step 2
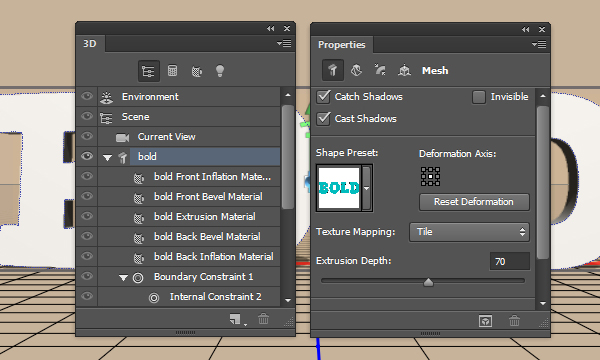
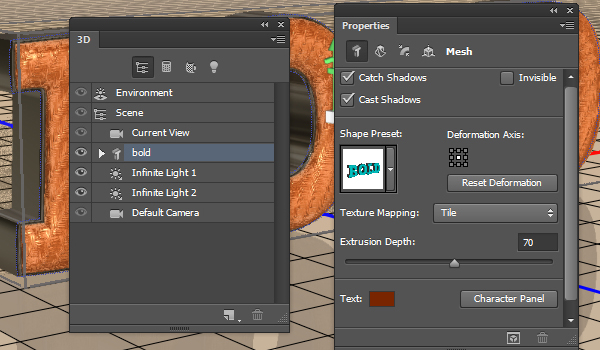
Click the mesh name in the 3D panel. Then in the Properties panel, change the Texture Mapping to Tile, and the Depth to 70.
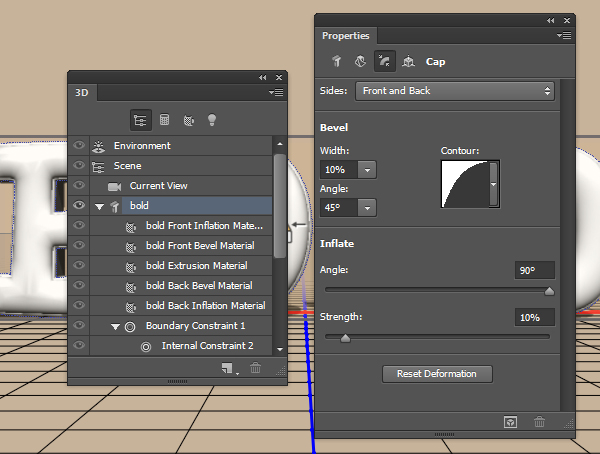
Click the Cap icon at the top of the Properties panel. Then, under Bevel, change the Width to 10%, the Angle to 45°, and choose the Half Round contour. Under Inflate, change the Angle to 90°, and the Strength to 10. This will inflate the front part of the mesh.
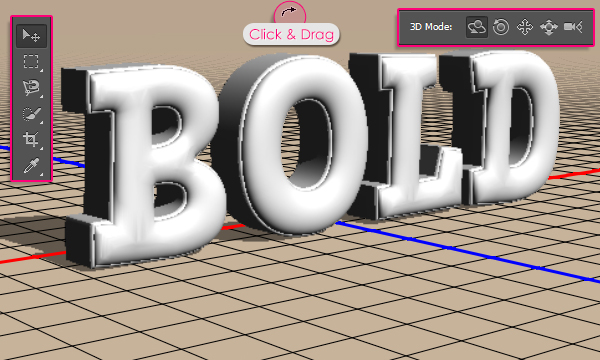
Select the Move Tool. You’ll notice some new 3D icons in the far right side of the Options bar. Those icons are the set of 3D Modes. When you choose one of them, you can click and drag to perform changes on the selected 3D element.
So you can click and drag in any empty area of the 3D scene to change the Camera View, but don’t rotate the 3D mesh yet.
 Step 3
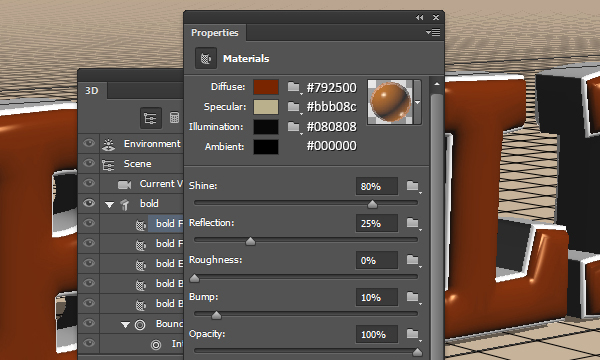
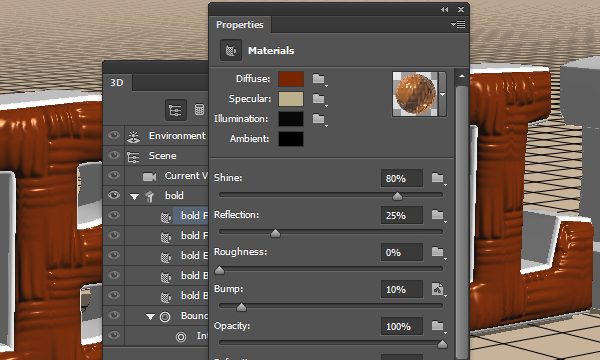
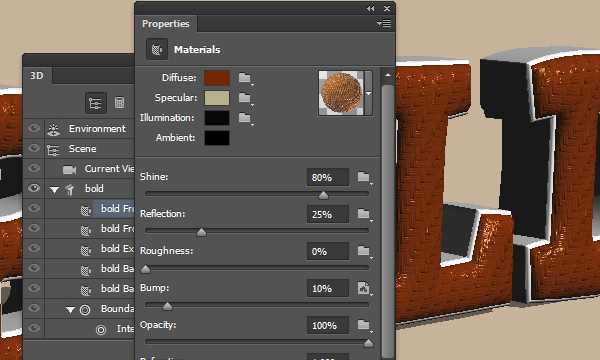
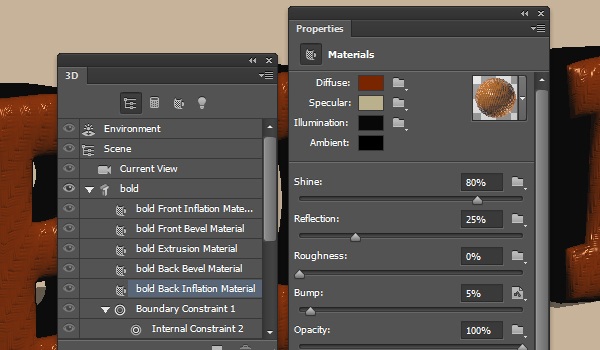
Select the Front Inflation Material in the 3D panel. Then, in the Properties panel, change the Diffuse color to #792500, the Specular to #bbb08c, the Illumination to #080808, and the Ambient to #000000. Also, change the Shine to 80% to create a smaller specular spot size, and the Reflection to 25% to create a reflective surface.
Click the Bump folder icon and choose Load Texture.
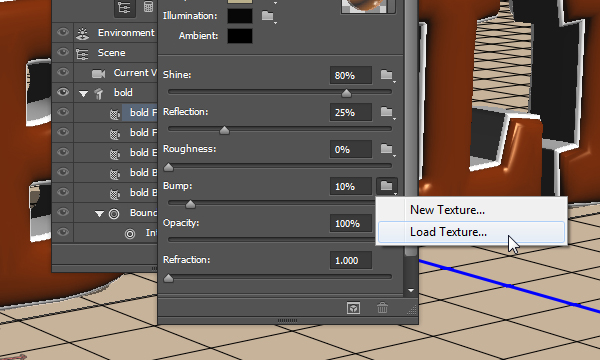
Browse for and open the BumpTexture.jpg image. This will apply the texture to the front material as a bump map. So the lighter areas of the texture will create raised surfaces, while the darker ones will create flatter surfaces.
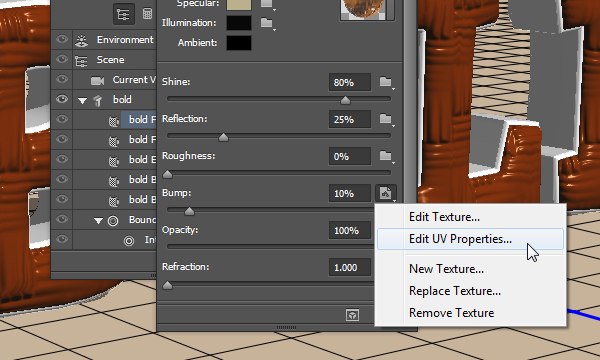
The texture looks big on the mesh. To fix that, click the Bump texture icon and choose Edit UV Properties.
In the Texture Properties box, change the U Scale to 600%, which will repeat (tile) the pattern vertically, change the V Scale to 100%, and the U Offset and V Offset to 0%.
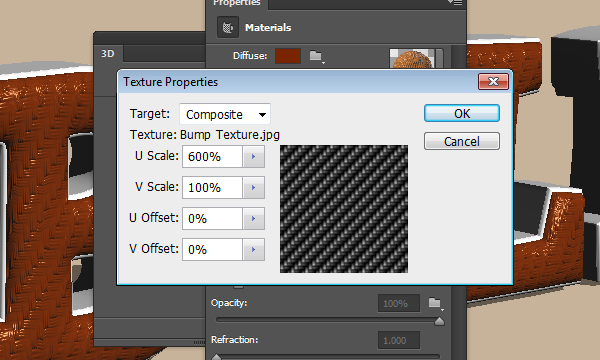
The texture looks much better now, but you can try other values if you like as well.
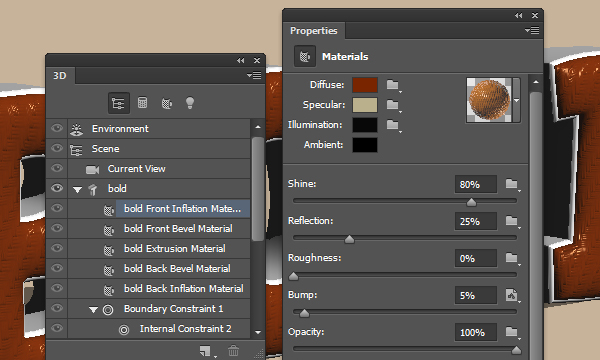
If you find the bump effect very strong, you can always decrease its value. Here, it is set to 5.
 Step 4
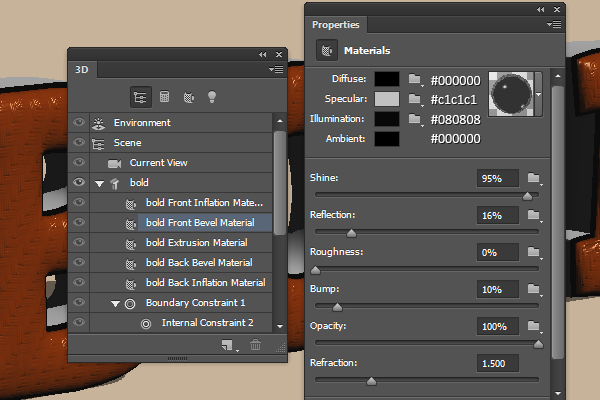
Select the Front Bevel Material. Then, in the Properties panel, change the Diffuse color to #000000, the Specular to #c1c1c1, the Illumination to #080808, and the Ambient to #000000. Also, change the Shine to 95%, the Reflection to 16%, and the Refraction to 1.5.
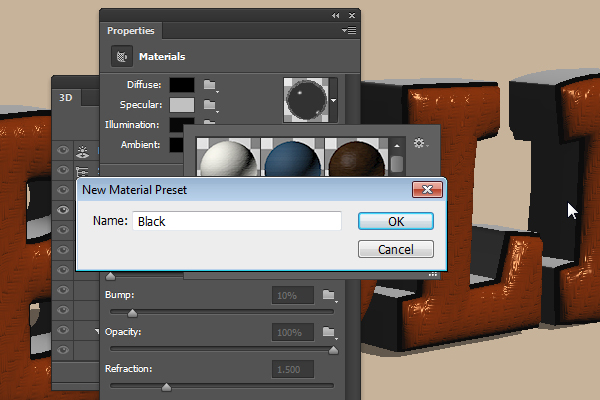
To save the material and re-apply it instead of recreating it each time, click the material preview box arrow, then the pop-up menu arrow to the right, and choose New Material.
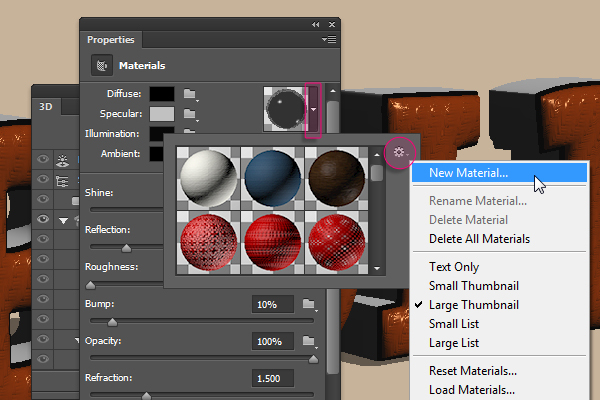
Type in a name for the material and click OK.
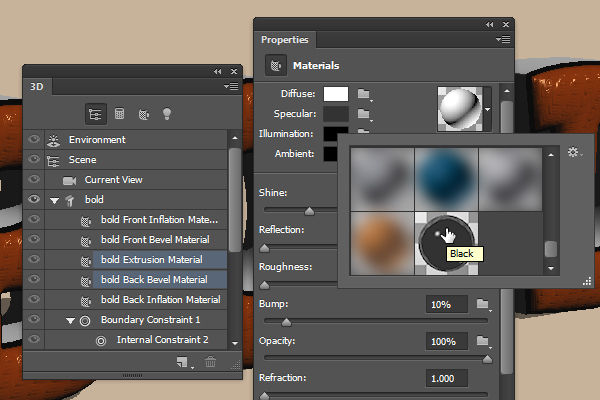
Press and hold the Ctrl key, then click both the Extrusion Material and the Back Bevel Material tabs, and release the Ctrl key. Then go ahead and scroll down the Material Picker to apply the saved material by clicking its icon.
Apply the same Front Inflation Material to the Back Inflation Material as well.
 Step 5
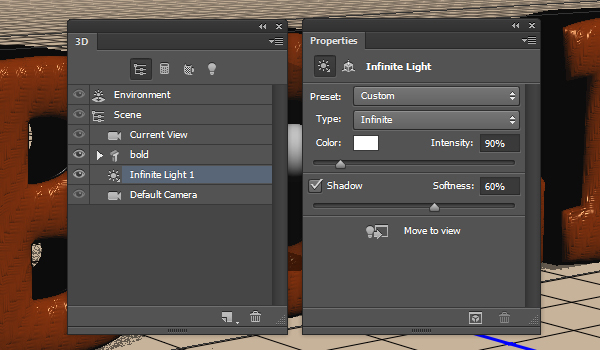
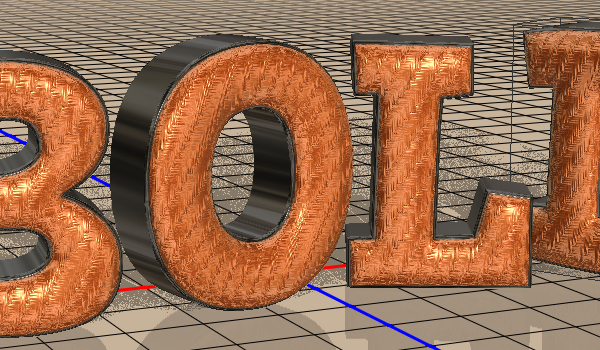
This is how the text looks so far. Next, we are going to adjust the Lighting.
Click the Infinite Light 1 tab in the 3D panel, then change its Intensity to 90% and its Shadow Softness to 60% in the Properties panel.
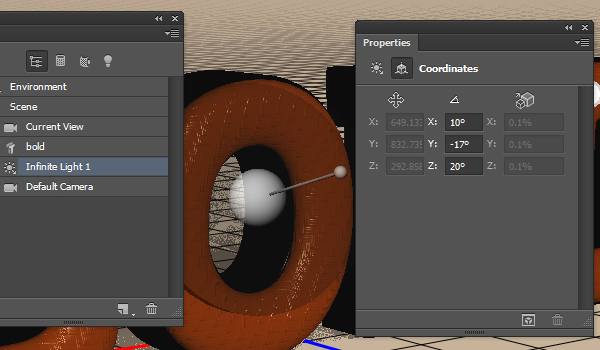
Click the Coordinates icon at the top of the Properties panel, then change the Rotation values as shown below: (X = 10°, Y = -17°, Z = 20°).
 Step 6
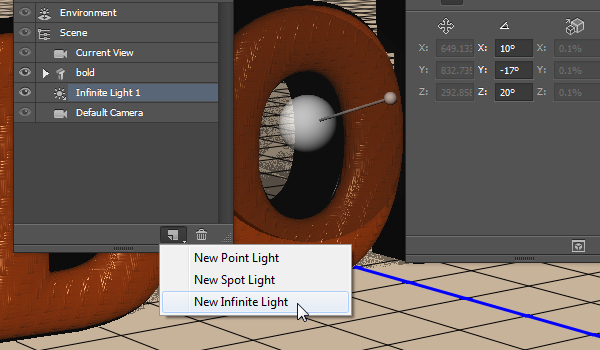
Click the “Add new Light to Scene” icon down the 3D panel, and choose New Infinite Light.
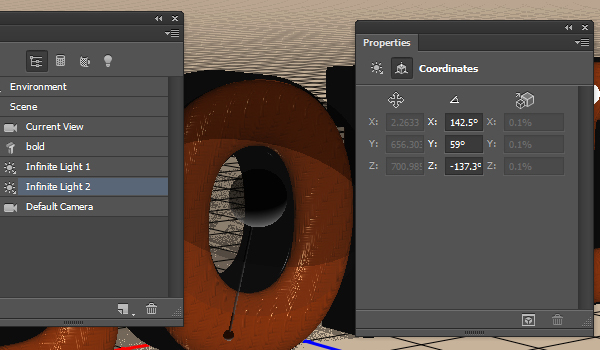
Change the Infinite Light 2 Intensity to 40% and un-check its Shadow box.

Click the Coordinates icon at the top of the Properties panel, then change the Rotation values as shown below: (X = 142.5°, Y = 59°, Z = -137.3°).
 Step 7
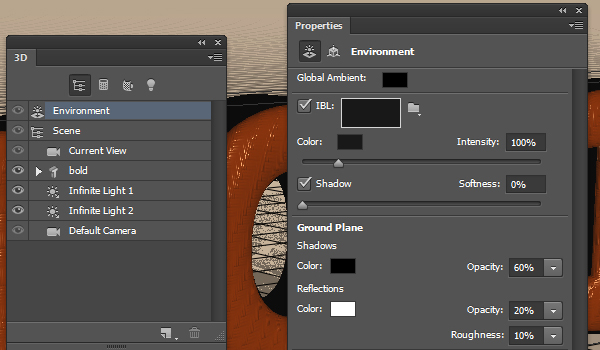
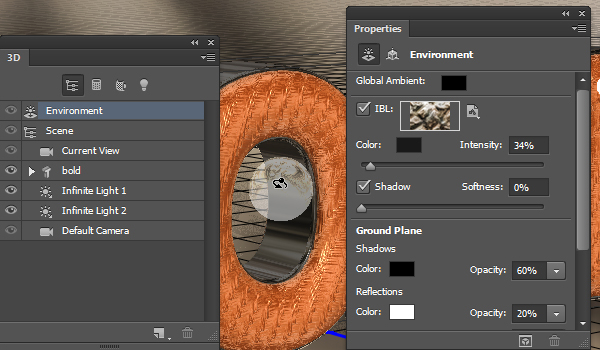
Click the Environment tab in the 3D panel. In the Properties panel, under Shadows, change the Opacity to 60%, and under Reflections, change the Opacity to 20% and the Roughness to 10%.
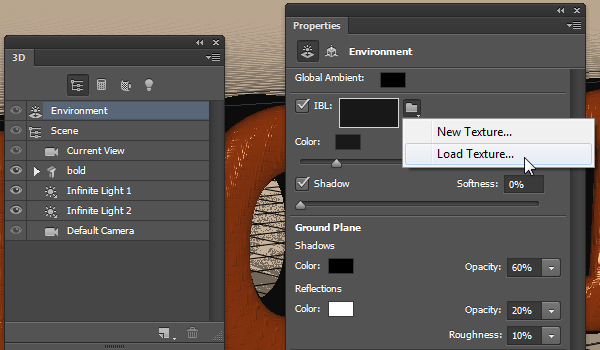
Click the IBL folder icon and choose Load Texture. Browse for and open the Chrome Water texture image.
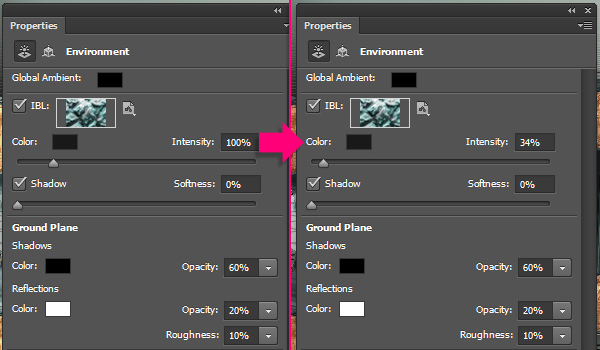
Lower the intensity to a value around 34%.
 Step 8
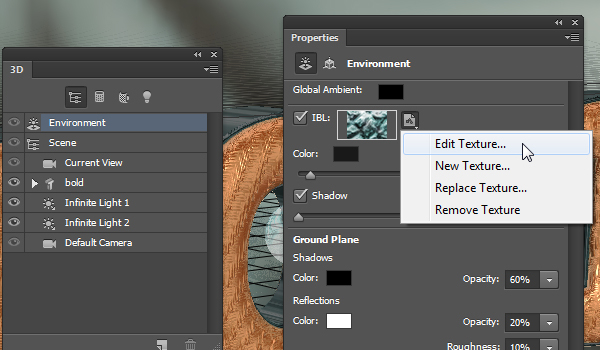
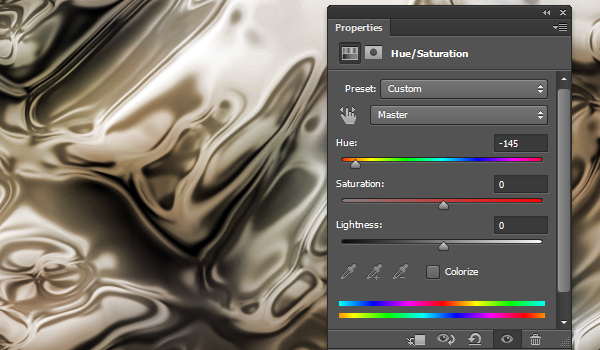
The blue color in the texture adds blue illumination to the scene. So click the IBL folder icon and choose Edit Texture to open the texture file and edit it.
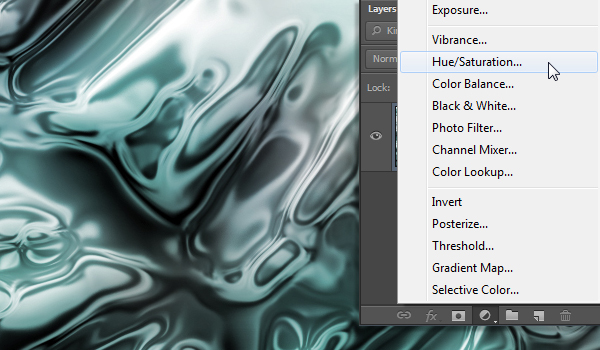
In the texture’s file, click the “Create new fill or adjustment layer” icon down the Layers panel and choose Hue/Saturation.
Change the Hue value to -145.
Save the file, close it, and go back to the original 3D scene document. If you still don’t like the result, you can go back to edit the file an try some other Hue values. Make sure you don’t want to change anything else in the 3D mesh or the scene before you continue.
 Step 9
Click the 3D mesh group in the 3D panel, then go to 3D -> Split Extrusion.
You’ll get a dialog box telling you that you’ll lose any animation for the mesh. Click OK.

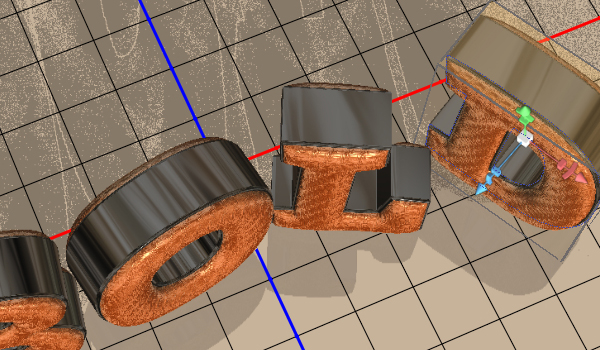
What this does, is that it splits the main text mesh into separate meshes, one for each letter.
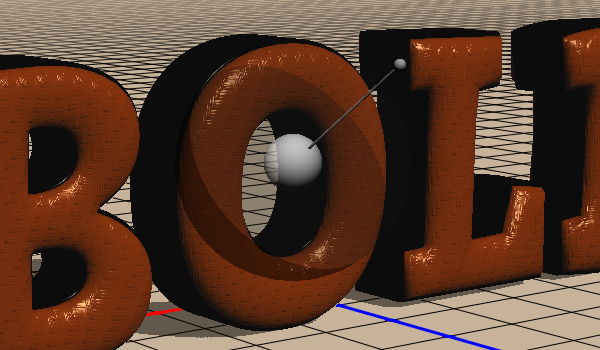
Use the Move Tool to move, rotate, and place the letters in the Scene.
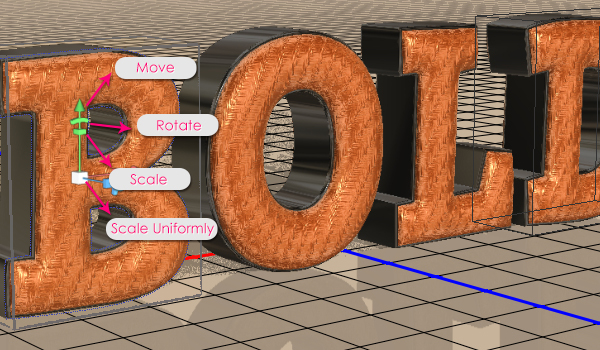
You can simply click the mesh in the 3D scene (or select its name in the 3D panel), and use the 3D axis to make any changes.
The arrows at the ends of the axis move the mesh, the part below them is used for rotation, and the cubes are used for scaling. The cube in the center is used to scale the object uniformly. All you need to do is click and drag the wanted part.
You can also click the Current View tab in the 3D panel, then change the camera view to check how the scene looks from different angles, and to make sure that the meshes are not overlapping.
 Step 10
Finish positioning the meshes, and choose the final camera view (angle). One last thing you might need to check is that the meshes are not sunken in the Ground Plane or floating above it. So select the meshes and go to 3D -> Snap Object to Ground Plane.
Finally, go to 3D -> Render to render the final result. This might take some time, but you can stop the rendering anytime by clicking anywhere inside the document.
Conclusion
This is the final result. The color and lighting make the texture pop, while the sleek sides add an elegant touch and define the main texture. And the rough semi reflective ground plane finishes off the whole 3D scene.
Hope you enjoyed the tutorial and found it helpful.

الشرح منقول من موقع اجنبى


 منذ /06-07-2013, 07:07 PM


 المواضيع المتشابهه


 العرض العادي

